|
For new expedition racers, bike boxes can freeze you in your tracks, especially if the race you're eyeing requires standard dimensions from the Adventure Racing World Series. Unfortunately, you can’t walk into a local bike shop and buy one, and this is one thing Amazon likely won’t stock…we don't think …actually, it looks like they sometimes do, but as of this writing, they aren't available...we digress... Walk around a transition area or peek into the back of the RDs' U-Haul at most expedition races and you will find a real hodgepodge of bike boxes. Most notably, you will see that many, perhaps most, are, in fact, hand made. So, where does one begin?! Pre-Made Boxes At one time, Crateworks fabricated a bike box that met ARWS dimensions. As of now, they seem to have stopped production on those boxes. Those boxes were not cheap, and they typically didn't seem to hold up as well as some of the better built DIY boxes -- not because the quality of the boxes was poor, but because their ability to break down meant that there were more moving parts, which caused more wear over time than with some firmer less flexible boxes. Still, you didn’t have to put time and labor into building the box yourself, and they were designed to break down, fold flat, and store easily. If you don’t mind spending a bit more, then an option like this is an easy solution. The team from Rogue Adventures in Australia offers a list, which they update periodically, of outfitters currently producing bike boxes. Keep in mind you likely will pay for the box and shipping. 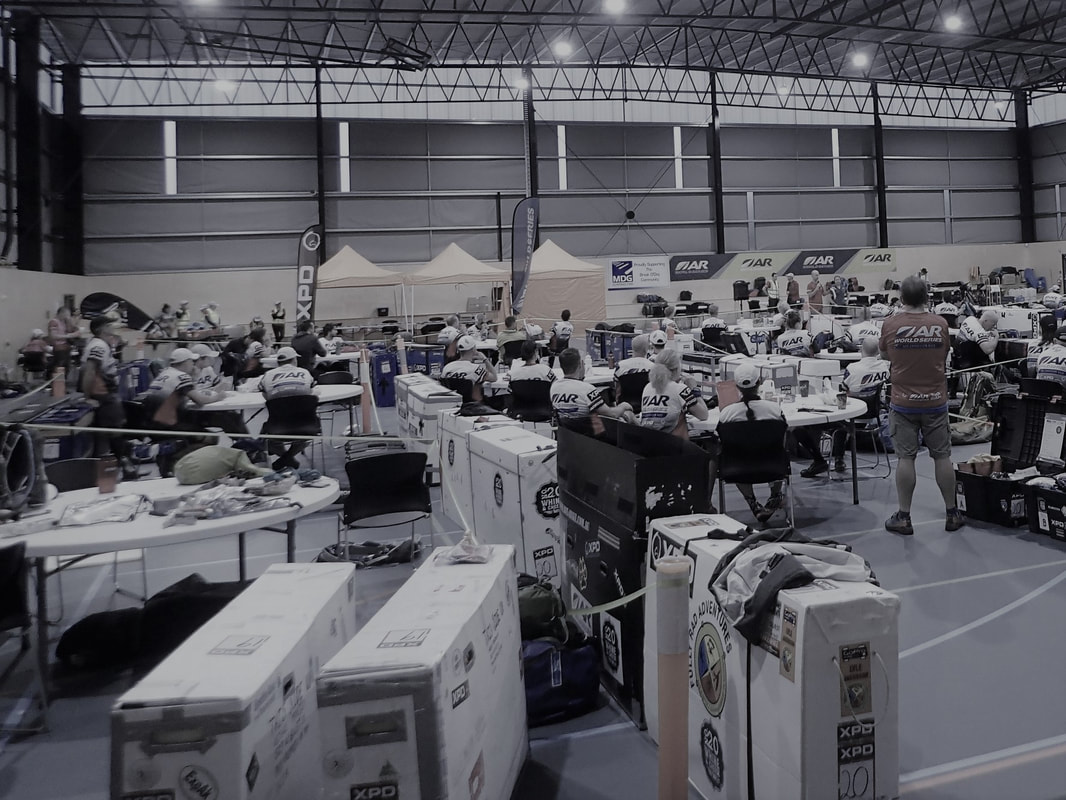 Our boxes are in the bottom, left hand corner. You can see some other styles, including lids, rope handles, etc. The DIY Box OK, so you are going to go it yourself. Here’s what you need to know: DIMENSIONS. As noted above, plan to build your bike box to ARWS dimensions: 140cm X 80cm X 30cm. All ARWS events will use these standard dimensions. If you err on one side of the measurement, go small. MATERIALS. You are looking for corrugated sheets of plastic. Some call this coroplast, others corflute. You can typically buy this in 5mm or 6mm sheets. We have used 6mm for our boxes, with good results. They are a bit sturdier, stand up better when traveling, protect your equipment to a higher degree, and have a long shelf life. We built ours eight years ago, and we haven’t had to do any repair work. Getting your hands on such sheets is the real trick as they can be hard to find. We have had luck at a local sign shop like this, which has stocked sheets of coroplast or has been able to order them, and we have ordered two 5x10-foot sheets per box. You will also need a heavy-duty bonding agent that will work on plastic surfaces, and you will need something to secure sheets together. We have used rivets and washers, which have worked well for us. They don’t weigh as much as other hardware, and with proper washers, they have held up without needing to be replaced. That said, you will need to invest in a rivet gun. We know other racers have had success with their own fastening systems. Ask around. You will need some basic tools: X-acto knife, a tool designed specifically for cutting coroplast (you can live without it, but it makes some of the cutting much easier and cleaner), a drill, a rivet gun (if using rivets), or other tools if using a different fastening system. Finally: when cutting the plastic sheets, consider the surface you are cutting on. Make sure it is a surface that can be marred by the X-acto blade, or use some cardboard to protect the floor. You will also need some heavy weight to help allow the adhesive to set. Finally, make sure you have plenty of time. You will likely need a fair bit of it to complete the project, including multiple time blocks to apply the adhesive and let it dry. Don't wait until race week! 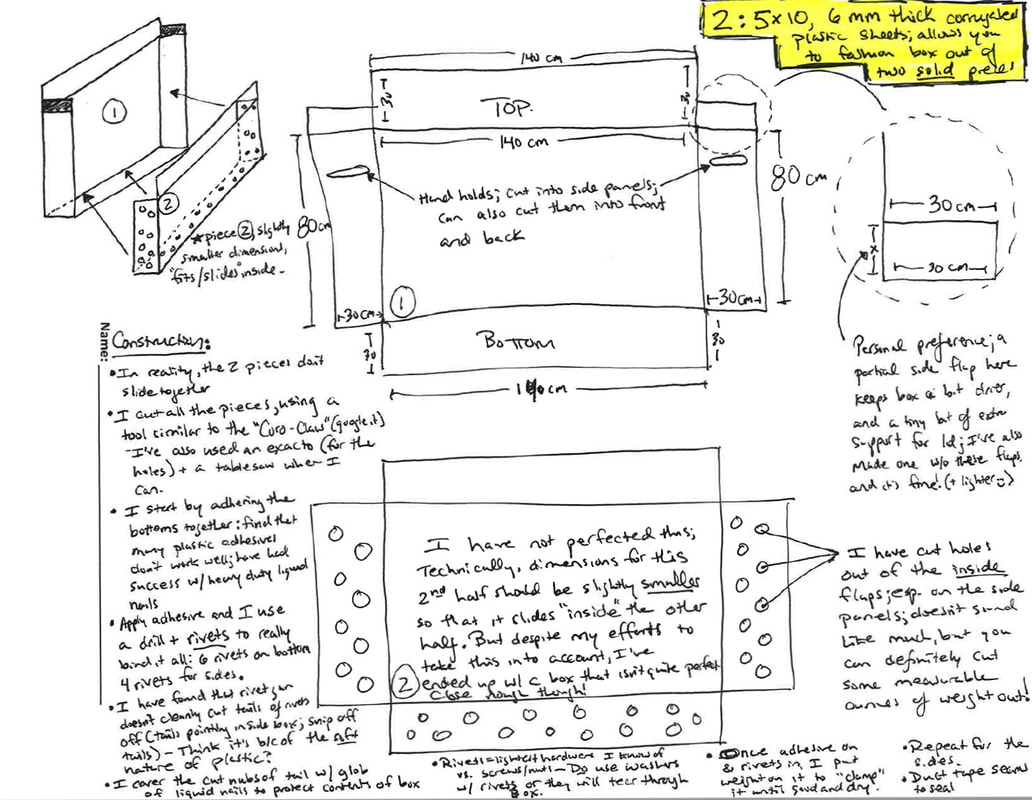 Our Bike Box "Blueprint" Design
Before reinventing the wheel, the previously mentioned article by Rogue Adventure presents a great design with terrific instructions and is worth consideration. Some racers have made clamshell style boxes. These boxes take more effort to design and build, but they open up nicely, and such boxes allow easier access to whatever is packed in the box. Ease of access can really make life seem so much easier on day four of an expedition race! Our preferred model, however, is a simple variation of Rogue’s box. Check out the more detailed “blueprint” above for details. We prefer it for a few reasons:
None of this is to say these boxes are perfect or that you shouldn’t consider alternatives, but we like simple! As always, network: ask other racers what they use, what they have built, and why. What has worked well, what hasn't? Check out some different styles. Mix and match what works for you and what you like from various approaches. In the end, you probably won’t save much in building it on your own, so consider whether it’s worth the time and effort. Just make sure you invest your money and/or time in something that seems durable. The worst is acquiring or building a flimsy bike box that either breaks down during the race or needs to be replaced or rebuilt a year or two later, and even worse than that is the weak box that doesn't do it's primary job: protecting your bike from damage during transportation.
2 Comments
1/18/2022 07:37:06 am
If you don't want a DIY project, our team recommends the Bike Box Company's boxes, which were designed by a top AR team in South Africa (Painted Wolf). There's a U.S. distributor in Colorado; more info at https://bikebox.company/.
Megan
3/23/2022 07:32:09 pm
Does anyone have any resources on bike box packing tips - and what one has to be prepared to do mechanically to reassemble/disassemble a bike for bike box transport? Your comment will be posted after it is approved.
Leave a Reply. |
 RSS Feed
